|
Lighter Trigger Pull |
Post Reply 
|
Page 12> |
| Author | |
FireboM 
Member 

Strike 1, Avatar was a No-No. Joined: 06 November 2004 Location: United States Status: Offline Points: 553 |
 Post Options Post Options
") Thanks(0) Thanks(0)
 Quote Reply Quote Reply
 Topic: Lighter Trigger Pull Topic: Lighter Trigger PullPosted: 09 February 2005 at 3:10pm |
|
Is there any way to make the trigger pull on the 98 c lighter? i heard that you replace the return spring with a clicky-pen one but does that even work? |
|
|
"She's the one who keeps me all excited, she keeps me begging for more"
Never Leave-Seether |
|
 |
|
|
tipman_drew
Member

how du u get a tilte? Joined: 19 September 2004 Location: United States Status: Offline Points: 290 |
Post Options
Thanks(0)
Quote Reply
Posted: 09 February 2005 at 3:15pm |
|
hey umm the pen spring mod well my opion is that it doesen;t work cue even though the trigger pull is eayser when the gun is not cocked its still the sam hardness when cocked w/out the pen spring but yeah it just my opion and i dunno if there is i'm tryin to figure that out too cuz i'm doin my tournment and i need a short pull too
|
|
|
tippmann 98c
drop foward response trigger expansion chamber viewloader revelution rocket cock 2 14" jandj barrel kit polished internals no hopper wabble pen spring mod 24oz tank |
|
|
|
|
Mxguy2725
Member

Joined: 09 February 2005 Location: United States Status: Offline Points: 7 |
Post Options
Thanks(0)
Quote Reply
Posted: 09 February 2005 at 3:27pm |
|
ive heard all around that it does but ive never done it... i wouldnt try either

|
|
|
Watch your back... your only hybrid...
o ya... and my kitty is kewl...
|
|
|
|
|
pbdude985
Platinum Member 

Dude! Sweet! Dude! Sweet! Dude! Sweet! Joined: 13 July 2004 Location: United States Status: Offline Points: 6876 |
Post Options
Thanks(0)
Quote Reply
Posted: 09 February 2005 at 3:42pm |
|
i did it and you dont really feal the difference if you want a good mod polish your internals. I felt a big difference when i did it. go to www.model98.net to get some info about it
Edited by pbdude985 |
|

|
|
|
|
|
tipman_drew
Member
how du u get a tilte? Joined: 19 September 2004 Location: United States Status: Offline Points: 290 |
Post Options
Thanks(0)
Quote Reply
Posted: 09 February 2005 at 3:43pm |
|
^ y do u tell him not to try it?
|
|
|
tippmann 98c
drop foward response trigger expansion chamber viewloader revelution rocket cock 2 14" jandj barrel kit polished internals no hopper wabble pen spring mod 24oz tank |
|
|
|
|
Justice
Platinum Member

Strike 1 - Sexual slurs 5/2 Joined: 20 March 2004 Location: United States Status: Offline Points: 4454 |
Post Options
Thanks(0)
Quote Reply
Posted: 09 February 2005 at 4:14pm |
|
I like the pen spring mod. I also polished my internals. I also heard you can use earth magnets (found at radio shak) instead of springs. Someday I will have to try that.
|
|
|
|
|
bluemunky42
Member

Guested. Middle Finger post. Joined: 19 December 2004 Location: United States Status: Offline Points: 1311 |
Post Options
Thanks(0)
Quote Reply
Posted: 09 February 2005 at 5:08pm |
not true, when its cocked it still the same light pull but with gas installed its not the same at all its pretty hard and isnt worth it at all. a trigger stop would help tho |
|
|
|
|
DeathMetal
Member
Joined: 09 February 2005 Status: Offline Points: 3 |
Post Options
Thanks(0)
Quote Reply
Posted: 09 February 2005 at 7:08pm |
|
Earth magnets huh? do you have a link on how to install it?
|
|
|
|
|
the_blade
Platinum Member

<esser is more Joined: 11 June 2002 Location: United States Status: Offline Points: 3219 |
Post Options
Thanks(0)
Quote Reply
Posted: 09 February 2005 at 8:15pm |
|
To noticibly lighten the trigger you really would have to get a low pressure kit. It contains a new hammer thats much lighter so therefor it puts less pressurse on your trigger and makes it alot eaiser to pull. I have never even shot my custom with a trigger return spring its really usless because as the gun is cycling through its shot the sear pushes on the trigger and returns it back to its position. One thing you should really look into is polishing out your internals it increases you gas effeincy alows the oil to spread more evenley so the internaly are protected better and makes it alot easier on the rear bolt oring. http://www.model98.net/mod3.html |
|
|
95 base neon 3.0 cai, knifedged crankshaft 60 mill throttle body,14 crane cam crane springs/retainers eagle rods port matched/ polished intake p&p head shaved .015 phantom grip diff dohc exuast
|
|
|
|
|
You Wont See Me
Moderator Group 
Found in Big Al’s underwear drawer Joined: 02 December 2003 Location: Neutral Zone Status: Offline Points: 13335 |
Post Options
Thanks(0)
Quote Reply
Posted: 09 February 2005 at 9:22pm |
|
|
|
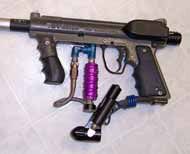
A-5
E-Grip JCS Dual Trigger DOP X-CORE 8 stage x-chamber Lapco Bigshot 14" Beadblasted Optional setup: R/T Dead on Blade trigger |
|
|
|
|
msoap111
Member

Joined: 07 December 2004 Location: United States Status: Offline Points: 4 |
Post Options
Thanks(0)
Quote Reply
Posted: 10 February 2005 at 2:01am |
|
Just spray some WD40 all over your trigger, thatll grease it up and make the pull lighter

|
|
|
|
|
Shadowminion
Gold Member 

Strike 1 - Language, 3/20 Joined: 06 June 2004 Location: United States Status: Offline Points: 1625 |
Post Options
Thanks(0)
Quote Reply
Posted: 10 February 2005 at 5:13am |
|
the intelligence of the last two posts astounds me ,,,, First off WD-40 is a penetrating oil , and will attack the orings of your marker , dont do it . YWSM ,,, I dont know where you get your info , but it certainly isnt Tippmann , or any of the forumers who have polished their internals !! In fact,, of the 10,000 or so forumers we have , name me even ONE forumer who legitimately claims to have screwed up his marker by polishing it . The question was how to lighten the trigger pull , and last night I wrote a lengthy post on just that in this thread , but it got ate when I tried to post it , so here goes again : There are a couple ways I could recommend for lightening trigger pull , somebody mentioned above that its harder when the marker is gassed up , but thats a crock too , they obiviously havent inspected the way the trigger works in a 98 /98C . There are two springs that affect the tension of the rear bolt on the sear , the Mainspring , and the sear spring . (Oh ,yeah , the trigger return spring too , ,just remove it ,its not needed ) Both of these can be modified/replaced to lighten the trigger pull , the mainspring can be replaced with kits from Maddmann for the 98c , I believe they have several grades of springs that have worked sucessfully in 98's . The sear spring , is most of what the discussion has been related to ,in this post so far, and for detailed info , model98.net has instructions and pics to help any that are interested in doing this (penspring mod) . For further lightening of the trigger pull ,it will require what is known to gunsmiths as polishing the sear . I have done this to both my 98's and the resulting trigger pull is well under a pound , Vs. the 3 pound trigger pull stock . PM me if you want details on how to do this , its a lot of work , and you must pay attention to several details in order to be sucessful . but time runs out for me posting a full detailed How-to right now , I have to go to work Edited by Shadowminion |
|
|
SL68-II , micro honed and polished .688" bore . Tuff Enuf .
Widowmaker , under construction |
|
|
|
|
Bolt3
Member

What? Joined: 01 February 2005 Location: New Jersey Status: Offline Points: 4 |
Post Options
Thanks(0)
Quote Reply
Posted: 10 February 2005 at 1:13pm |
|
I hear the clicky pen does work.
Also it's probably just more effective to take out the spring and not replace it. You don't need it and it takes off the resistance towards pulling the trigger. |
|
|
|
|
A5 dude15
Gold Member
Guested Pottymouth Joined: 21 June 2004 Location: United States Status: Offline Points: 2146 |
Post Options
Thanks(0)
Quote Reply
Posted: 10 February 2005 at 4:12pm |
|
^^^^^^^^^^^^^everyones pretty much already said everything
|
|
|
|
|
FireboM
Member
Strike 1, Avatar was a No-No. Joined: 06 November 2004 Location: United States Status: Offline Points: 553 |
Post Options
Thanks(0)
Quote Reply
Posted: 10 February 2005 at 5:14pm |
|
wait if you remove the return spring then which spring do you replace using the clickypen? Edited by FireboM |
|
|
"She's the one who keeps me all excited, she keeps me begging for more"
Never Leave-Seether |
|
|
|
|
Shadowminion
Gold Member
Strike 1 - Language, 3/20 Joined: 06 June 2004 Location: United States Status: Offline Points: 1625 |
Post Options
Thanks(0)
Quote Reply
Posted: 10 February 2005 at 6:24pm |
|
Ok, am off work now , and in response to the numerous PM's I have gotten , I will post sear polishing procedures here , but first I want to say , I am not responsible for any work you do to your marker , and you do so at your own risk . The sear is a hardened , grey piece of metal , and if you scratch your thumbnail across it , you will feel the roughness . First off the sear is case hardened , that means the hard metal is no more than 0.040"-0.060" in depth , you do NOT want to remove so much metal that you penetrate beyond this hardening ,in fact , all you want to do is JUST remove the surface roughness from the face of the sear , the face being the small portion of the sear that actually contacts and engages the rear bolt , an area of approximately 1.5mm X 2.5mm . Second , and just as important , you DO NOT want to change the angle at which the sear engages the bolt , unless you are familiar with gunsmithing and trigger work . that means you must hold the sear very firmly and prevent it from wobbling when polishing it !! All that being said,, here goes : Go to your automotive parts store , and get some wet or dry sandpaper , I used 1000 grit ,not too agressive on the metal , and leaves a good polished finish . Get a small perfectly flat surface , I used a small piece of window glass about the size of the sandpaper on a table , and put some water on it to help with the cutting action of the grit , now grip the sear firmly (Yes , you have to remove it from the marker ) , and press it down until you are sure you are matching the existing angle , and begin moving the sear in small figure eights . You will feel the sandpaper taking away the metal , and eventually will feel the movement get easier , when this happens , inspect the surface for a good flat polish on the face . It may take a few times , moving to a fresh area of the sandpaper , until you get something acceptable , but once you get a polished surface all over the face ,its time to quit . Wash the grit from the sear , lubricate , reassemble , and test fire ! If you in any way feel uncomfortable doing this , but want it done , almost any gunsmith will know this procedure , and should be able to do it for you , at a nominal charge , and have the equipment to do it quickly ! |
|
|
SL68-II , micro honed and polished .688" bore . Tuff Enuf .
Widowmaker , under construction |
|
|
|
|
DrunkDriver
Gold Member

Joined: 28 December 2003 Location: United States Status: Offline Points: 1610 |
Post Options
Thanks(0)
Quote Reply
Posted: 10 February 2005 at 6:47pm |
|
Go to www.model98.net. There are plenty of things you can do on there. When your gun is gassed up, there is not that big of a difference with the pen spring. |
|

|
|
|
|
|
frontman
Member

Joined: 28 January 2005 Location: United States Status: Offline Points: 56 |
Post Options
Thanks(0)
Quote Reply
Posted: 10 February 2005 at 8:16pm |
|
i dont know much and im probably stupid which some or most of u will agree but on my pro/carbine i took out my spring and accually put in a rubber band and it works great for me its never broke or froce in the winter or cold weathe but thats just me and some of u prolly think im dumb but heck it works for me jsut some advice
|
|
|
Tippman pro/carbine vertical adapter 2 stage expansion chamber 18 in. armson barrel E-hopper drop forward 4-1 pod pack 12 and 9 Co2 tank
|
|
|
|
|
Shadowminion
Gold Member
Strike 1 - Language, 3/20 Joined: 06 June 2004 Location: United States Status: Offline Points: 1625 |
Post Options
Thanks(0)
Quote Reply
Posted: 10 February 2005 at 9:03pm |
|
Thats a Orthodental rubberband mod , and its not dumb , lots of people use it , but they often have to change their "Rubbers" , He-he
|
|
|
SL68-II , micro honed and polished .688" bore . Tuff Enuf .
Widowmaker , under construction |
|
|
|
|
bafrank@att.net
Member
Joined: 27 November 2004 Location: United States Status: Offline Points: 17 |
Post Options
Thanks(0)
Quote Reply
Posted: 11 February 2005 at 1:34am |
Polishing the sear is the best way to accomplish a clean break of the trigger, but there is also another method that can help and when combined with the polished sear will produce a target quality trigger pull. The notch in the bolt into which the sear engages when the gun is cocked if relatively deep. Working on a firearm a smith, besides polishing the sear, may stone the notch to reduce the depth of engagement. It is delicate and a heavy hand may ruin the job requiring a replacement part. A crude but effective method is to fill the bottom of the notch to limit the depth of engagement. I have done it by taking small pieces of stainless shim stock and glueing one layer at a time into the bottom of the notch. Industrial super glue works very well for this (from McMaster-Carr or Brownells) and is removable to reverse the procedure. The object here is to limit how deeply the sear engages the notch. The more shallow the engagement the less creep of the trigger before the gun fires. Very careful polishing of the notch also helps, but mistakes can lead to uncontrollable full auto fire. On firearms I have taken 3 lb creepy trigger pulls down to crisp 4 ounce breaks (Ruger semi-auto target pistols). I have also messed up my share of parts and had to replace them. Best way to prevent that is to have a spare part sitting on the table...just in case. My 98c, after a combination of techniques, has a slighty creepy 6 ounce trigger pull...may cause a problem with some gloves (you cannot feel the trigger well enough to control the trigger break when sharpshooting). With my BSA electronic Red Dot sight, one shot "kills" are much more common.
|
|
|
Bruce A. Frank, Old School
|
|
|
|
|
Post Reply
|
Page 12> |
 Tweet
Tweet
|
| Forum Jump | Forum Permissions You cannot post new topics in this forum You cannot reply to topics in this forum You cannot delete your posts in this forum You cannot edit your posts in this forum You cannot create polls in this forum You cannot vote in polls in this forum |


 Topic Options
 tipman_drew wrote: