Finished 98C- Paint & Milling
Printed From: Tippmann Paintball
Category: Tippmann Paintball
Forum Name: Marker Gallery
Forum Description: Show us your guns!
URL: http://www.tippmannsports.com/forum/wwf77a/forum_posts.asp?TID=169230
Printed Date: 24 July 2026 at 5:09am
Software Version: Web Wiz Forums 12.04 - http://www.webwizforums.com
Topic: Finished 98C- Paint & Milling
Posted By: keeprollin02
Subject: Finished 98C- Paint & Milling
Date Posted: 06 August 2007 at 2:42pm
|
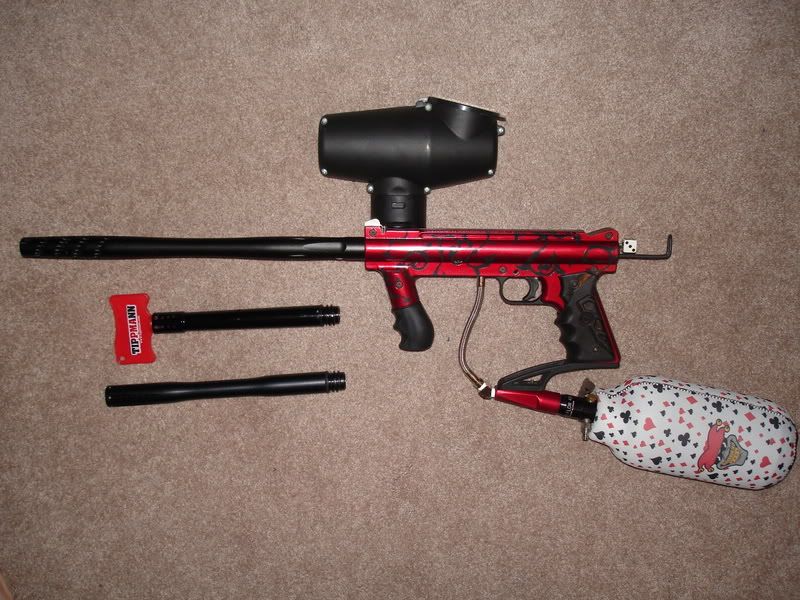
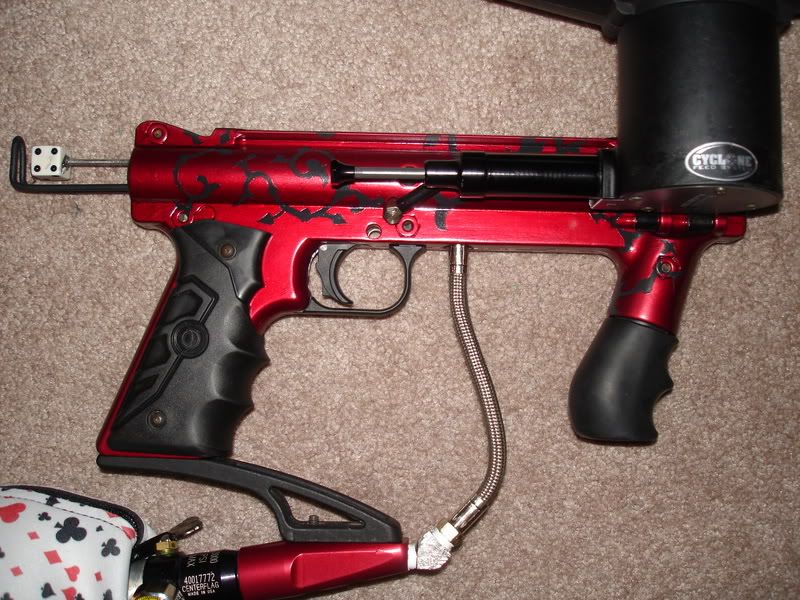
Did a lot of work to it and it came out awesome. Not putting an RT on it though cuz Im just getting rid of it, ive got too many markers laying around my room. -Mods-
|
Replies:
Posted By: SSOK
Date Posted: 06 August 2007 at 2:51pm
|
I really, really like that paintjob. It would be great if you could get an X7 hopper, double trigger, and possibly an E-Trigger, along with putting the stripes on the ASA. Great Job. ------------- 
|
Posted By: keeprollin02
Date Posted: 06 August 2007 at 2:55pm
| Im getting rid of it, so its finished while I still have it. |
Posted By: Yomillio
Date Posted: 06 August 2007 at 4:09pm
|
How/what did you use to get the vine design? ------------- 
http://www.tippmann.com/forum/wwf77a/forum_posts.asp?TID=172327 - Forum XBL Gamertag Collection |
Posted By: keeprollin02
Date Posted: 06 August 2007 at 4:21pm
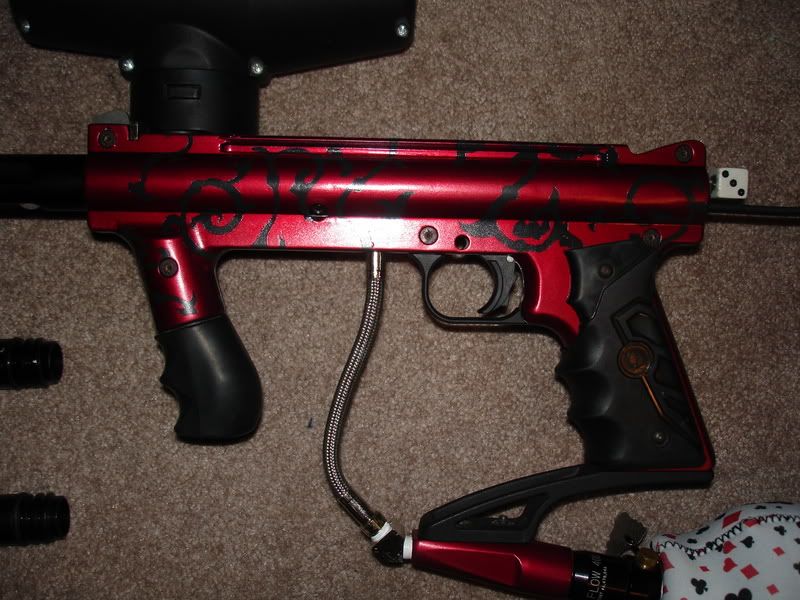
| Primered and did all the body work, then Painted the black, free handed the design, cut it out, layed it down on the gun, then painted the red. Then I removed the stencils, and clearcoated it. |
Posted By: RoboCop
Date Posted: 06 August 2007 at 4:27pm
| That paint job is suh-weet |
Posted By: b_mid
Date Posted: 06 August 2007 at 4:28pm
Oh my, thats beautiful
|
Posted By: combatpilot87
Date Posted: 06 August 2007 at 5:24pm
|
preeeety. ------------- Tippmann 98 Custom/ACT E-trigger/WAS Commando Stock or M-4 CAR Dye Ultralite Machine Gun Shroud Sight Rail w/CCO Cyclone Feed X-Chamber PMI P-E 72Ci 3000 PSI |
Posted By: sinisterNorth
Date Posted: 06 August 2007 at 6:04pm
|
Very nicely done. It's a shame you wont get to use it. ------------- Pumpker'd; (V.) When a pump player runs up and shoots you at point blank range because you thought 20bps made you good. |
Posted By: Ghost-Rider
Date Posted: 06 August 2007 at 10:40pm
|
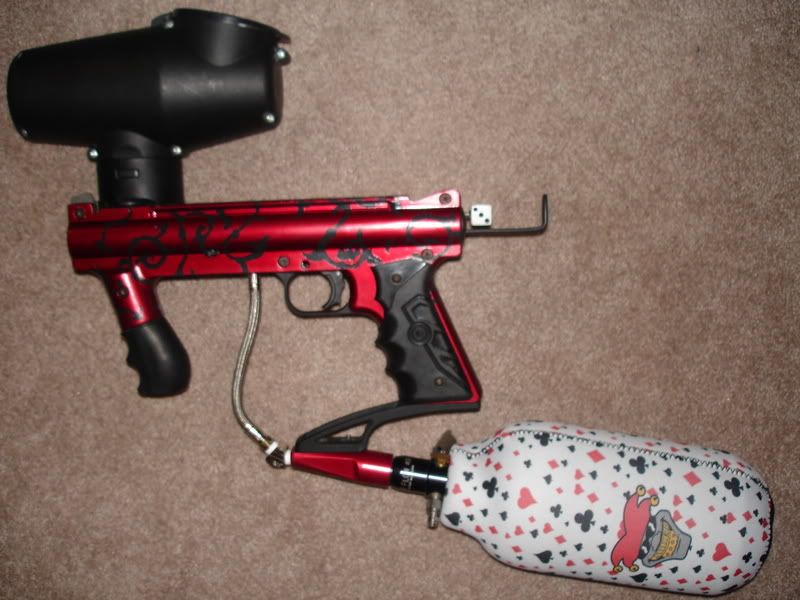
I like it a lot !,the dice adds a unique touch.
------------- 
|
Posted By: ChikunBenSniped
Date Posted: 06 August 2007 at 11:31pm
|
Simple, suave, and very easy on the eyes... Veeeeeeery niiiiiiiiice
------------- 
The New And Improved Chikun Pimp! NOW FEATURING SLUGGED UP KUNG FU GRIP ACTION GRILL! |
Posted By: Styro Folme
Date Posted: 07 August 2007 at 12:25am
|
i love that paint. give me some ideas for my project. ------------- X |
Posted By: youm0nt
Date Posted: 08 August 2007 at 1:41pm
| how did you do the rear cocking? |
Posted By: netramakin
Date Posted: 08 August 2007 at 2:03pm
|
The Joker? Love the black on red. Nice job! ------------- 
"I'm a riddle so strong, you can't break me." |
Posted By: jordanpischke
Date Posted: 08 August 2007 at 2:34pm
|
Looks sweet. ------------- 
|
Posted By: keeprollin02
Date Posted: 08 August 2007 at 2:54pm
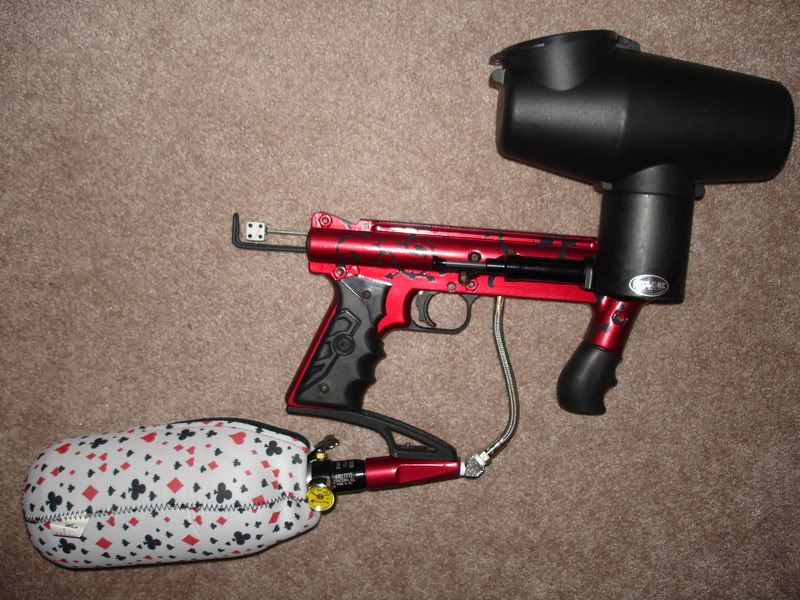
| Rear cocking was a whole lot easier than top cocking. Take the black plug thats on the back of the marker and drill out on of the holes above the spring hole in the center so that it fits the piece of rod or nail that you use as the cocking rod. Then drill a hole in the back of the rear bolt and jb weld the cocking rod into it. Pretty easy. I added the dice as a knob and made the beavertail out of another piece of rod i had laying around. |
Posted By: netramakin
Date Posted: 08 August 2007 at 3:04pm
|
Great; I was wondering how to do that, too; thanks. -------------
"I'm a riddle so strong, you can't break me." |
 keeprollin02 wrote:
Posted By: sporx
Date Posted: 08 August 2007 at 8:18pm
|
i like it. it's puuuuurrrrrrrty! ------------- 
|
Posted By: jesseat956
Date Posted: 11 August 2007 at 1:49am
|
dude that is one PIMPED OUT piece of equipment very nice job
|
Posted By: Monk
Date Posted: 11 August 2007 at 3:27am
| I think it would look better with a see-through red hopper. |
Posted By: keeprollin02
Date Posted: 11 August 2007 at 10:40am
| do they even make those for the cyclone feed??? |
Posted By: jesseat956
Date Posted: 12 August 2007 at 4:43pm
|
i dk but it would look effin cool w/ a hopper like that nice job
|
Posted By: jesseat956
Date Posted: 14 August 2007 at 6:36pm
what kinda paint did u use and how did u do the design? did u use primer? how bout gloss? thanx
|
Posted By: keeprollin02
Date Posted: 14 August 2007 at 11:45pm
| duplicolor self etching primer, duplicolor automotive spraypaints, and then 2-3 layers of clearcoat. design i drew onto 3m painters tape or 3m automotive masking tape and then cut out with an xacto blade, and stuck on the gun.. |
Posted By: jesseat956
Date Posted: 15 August 2007 at 1:46pm
|
Huge thanx man i really appreciate it and an outsanding job on your gun
|