
|
How 2: Install E-Grip on Alpha Black Basic or Tac. |
Post Reply 
|
Page <12 |
| Author | |
Syclops 
Member 

Joined: 29 January 2009 Location: Rochester, MN Status: Offline Points: 16 |
 Post Options Post Options
") Thanks(0) Thanks(0)
 Quote Reply Quote Reply
 Posted: 28 April 2009 at 11:56am Posted: 28 April 2009 at 11:56am |
For most...pictures are worth a thousand words.
|
|
 |
|
|
AQucsaiJr
Member
Joined: 07 May 2008 Status: Offline Points: 7 |
Post Options
Thanks(0)
Quote Reply
Posted: 28 April 2009 at 10:38am |
|
When you buy the E-Grip for the Alpha... It comes with instructions... But seeing these pics during the process helps out.
|
|
|
Be the artist not the portrait!
|
|
|
|
|
Monk
Moderator Group 

Joined: 23 October 2003 Location: United States Status: Offline Points: 6556 |
Post Options
Thanks(0)
Quote Reply
Posted: 11 March 2009 at 6:59pm |
|
Nice, very nice.
This cracks me up though. There had to be a guide to installing a 98c electro for m98, and now there is one using 98c electro for a later model. 98c pwns all. Edited by Monk - 11 March 2009 at 6:59pm |
|
|
|
|
Syclops
Member
Joined: 29 January 2009 Location: Rochester, MN Status: Offline Points: 16 |
Post Options
Thanks(0)
Quote Reply
Posted: 11 March 2009 at 3:58pm |
|
Hey everyone SYclops here. As promised, I have written a How To in regard to installing the E-Grip Upgrade on your Alpha Black Basic or Tactical model. Now some may ask, why would you do a write up when instructions are included in the package? The main reason is to educate those who wish to buy the upgrade but are a little leery concerning the install. I personally had many questions even before buying the thing LYNRDSKYNRD, Splat and Coaxial thanx for being patient with all my questions. 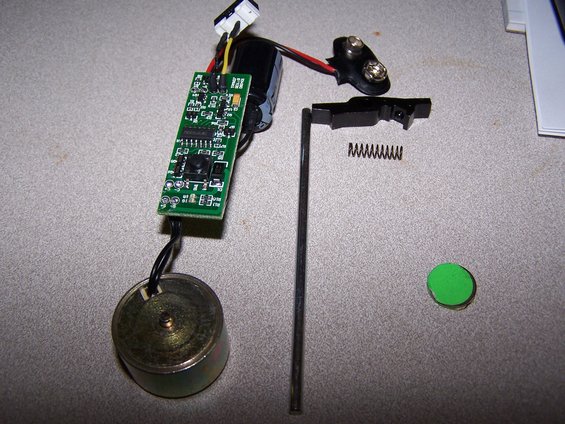 On to the install: 1) First and foremost, make sure you follow all safety precautions even before taking the gun apart (i.e. degas, uncock, etc.)
2) I started with the rubber grip. Remove the rubber grip from both sides of the receiver by taking out the small allen head bolts (x2)
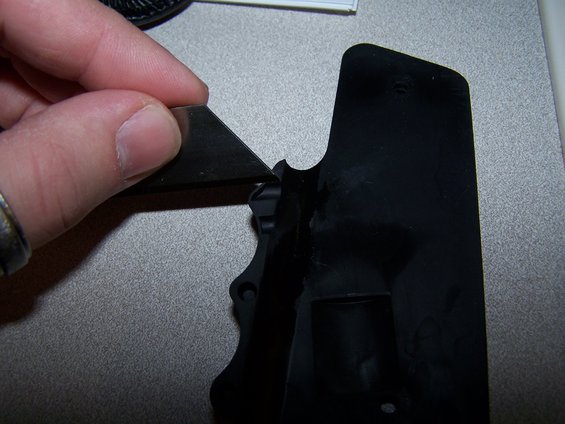
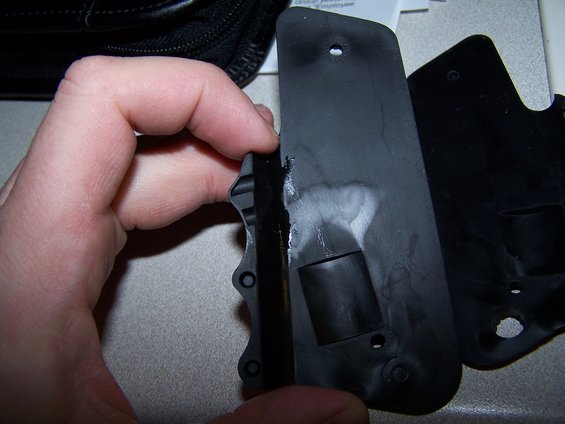 3) Take a razorblade and cut out the existing holes formed into the grip. This is where you will access the power button/mode selector switch and LED light.
 4) Remove all allen head bolts from the left receiver and pull the clamshells apart.
5) Next you are going to remove some material from the left hand received to make room for the battery. Place the left receiver inside up with the knockout plate flush on a flat surface.
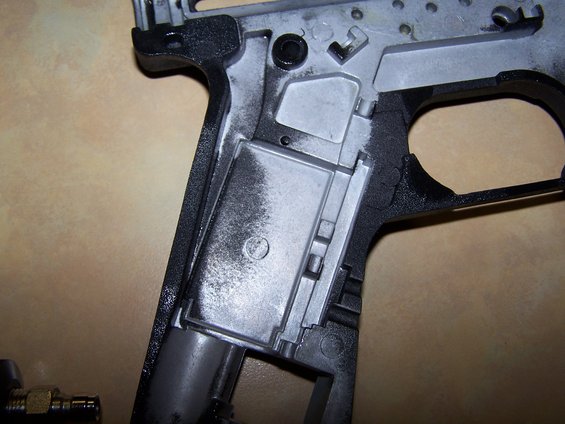 With a hammer and flat head screwdriver or punch start in one corner and carefully tap it loose by working your way around the plate until it is removed. It only took 1 hit in each corner to knock the plate loose.
 6) Next you will work on the trigger mechanism.
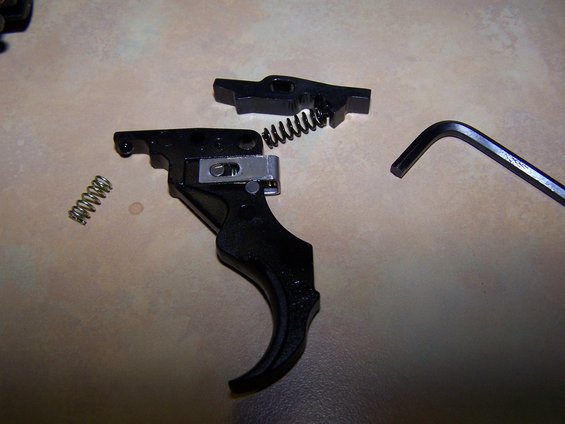
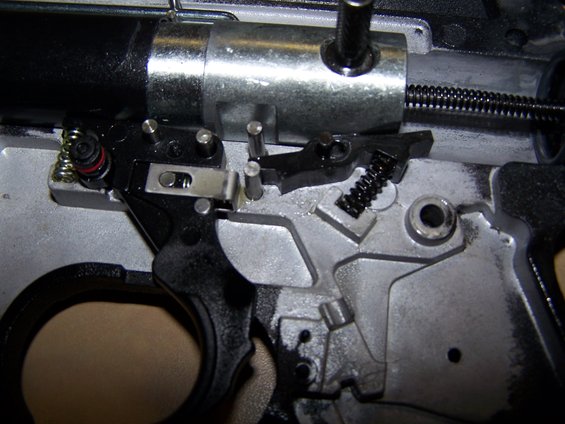 Remove the trigger and the trigger spring (Silver Spring on the left-hand side of the picture below will be re-used). Remove the trigger slider, slider spring and the two slider pins from the trigger.
7) Remove the old sear and sear spring from the right receiver. If the black dowel pin comes out, reinsert it. NOTE: save trigger slider, slider spring, the 2 slider pins and the sear and sear spring when and if you want to convert the gun back to semi-auto. These will not be used in conjunction with the E-Trigger.
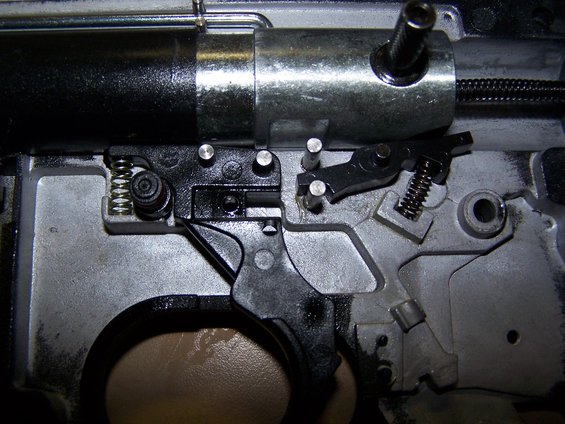
 8) Insert the trigger and OLD trigger spring into the right receiver.
9) Install the NEW Sear and NEW sear spring into the right receiver.
 10) Now it is time for your electronics. Place the solenoid into the right receiver
it is the 1 thick silver looking thing.
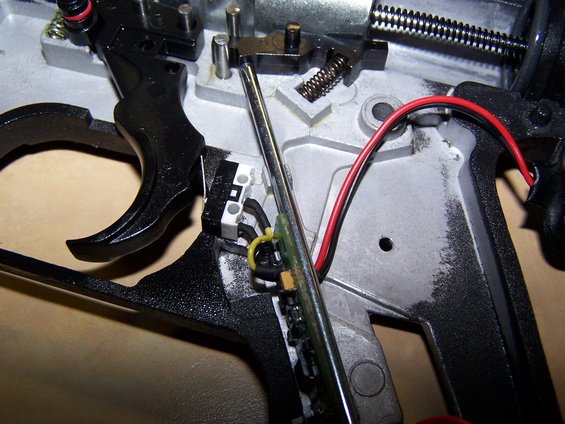
11) Carefully align and insert the electronics board into the predetermined slot.
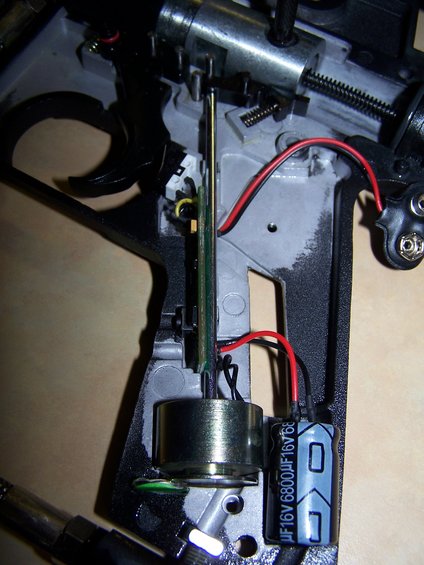 12) Place the trigger switch on two pins of the right receiver half. Insert the capacitor (black barrel looking object) in the provided slot.
13) Route wires in cutout areas to lay flat under armature pin and battery and not be pinched when receiver halves are reassembled. Visually inspect internal wires for disconnected wire ends or damage.
14) Insert armature pin into 2 slots so it moves freely, insert magnet in slot below armature as shown.
On the picture below you get a better idea of the arrangement of the trigger switch
 15) Double check all parts for proper placement and reassemble receiver halves.
16) Install
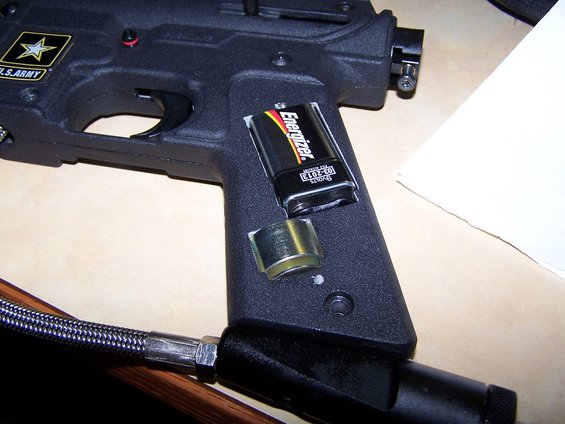 Hold the power button and for 3 seconds to turn the unit on. The E-trigger will default to semi-auto. Each click of the button will cycle you through the various modes. One flash = Semi-auto, Two Flashes = 3 shot burst, Three Flashes = Full Auto Normal (12 balls per second after initial 4th pull of trigger) and Four flashes = Full Auto Fast (15 balls per second after initial 4th pull of trigger). I hope this helps someone on the forum!
|
|
|
|
|
Post Reply
|
Page <12 |
 Tweet
Tweet
|
| Forum Jump | Forum Permissions You cannot post new topics in this forum You cannot reply to topics in this forum You cannot delete your posts in this forum You cannot edit your posts in this forum You cannot create polls in this forum You cannot vote in polls in this forum |


 Topic Options
 AQucsaiJr wrote: